How to: AI Prompt settings
Just learning how to start with AI Prompts? This article is about prompt settings - start with the How to: Prompts 101 article first.
This article explains the different settings you see when you are editing an AI Prompt. Start with this video:
Editing the Prompt, Choosing the Preview, Saving the Prompt
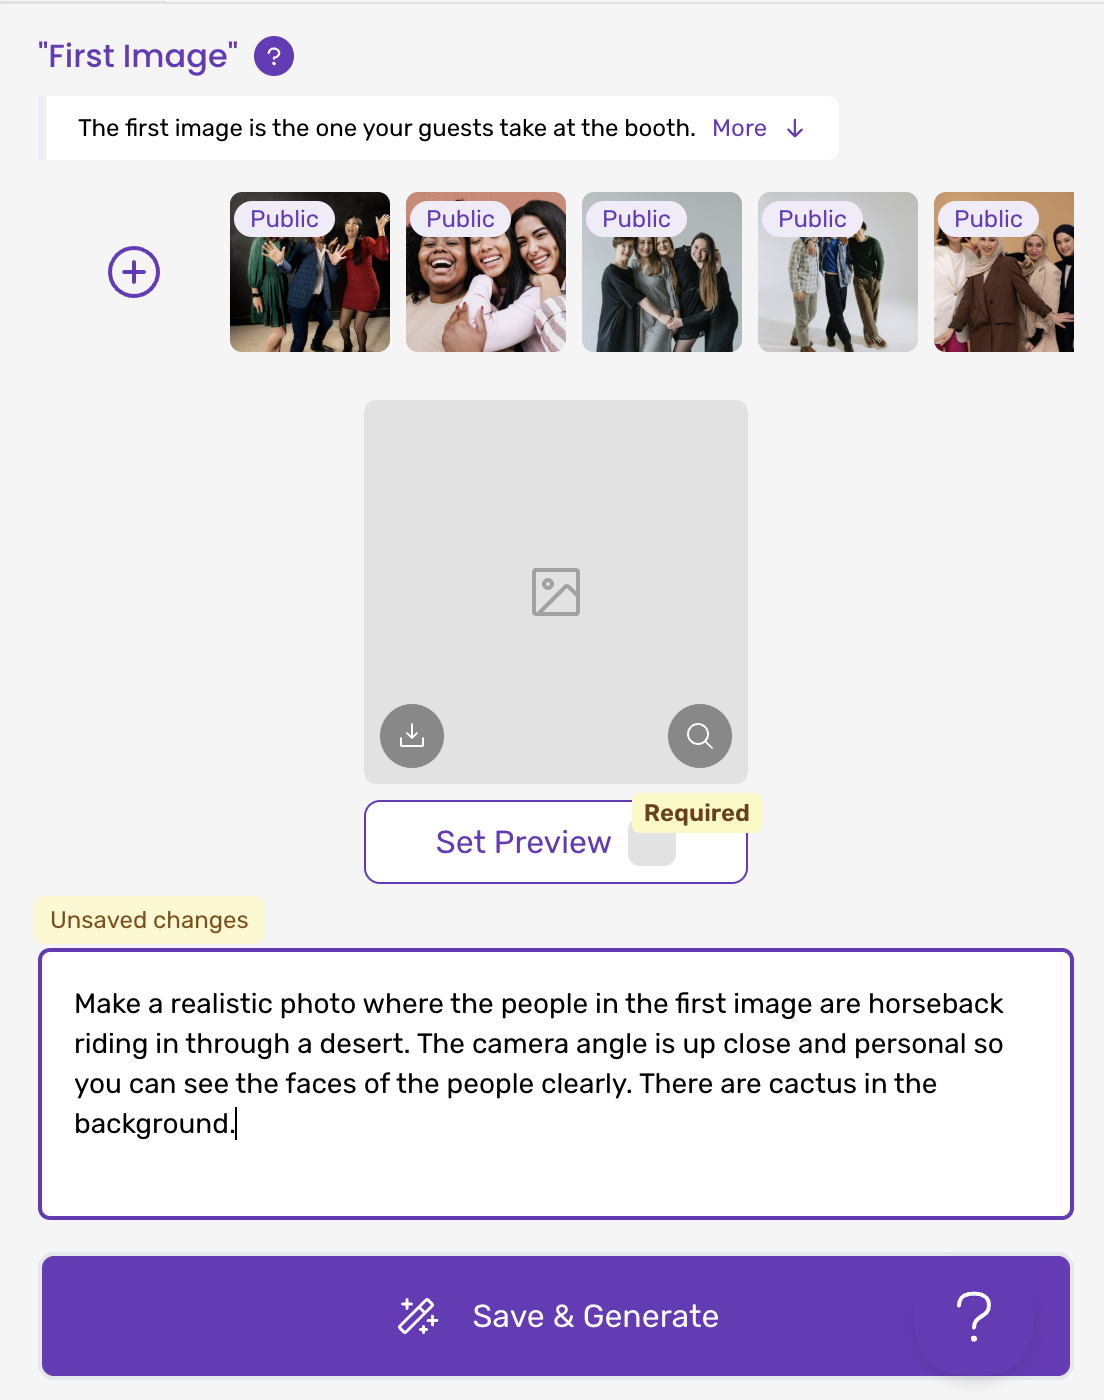
At the top of the prompt page you see a set of photos going from left-to-right. Those are the example photos you can use to to preview your prompt: after you select a photo and enter your prompt text, hit "Save & Generate" to create a photo from the prompt.
After you generate a photo, hit "Set Preview" to make the currently generated image the prompt's preview image. You cannot use a prompt until it has a preview that you've saved this way.
Additional Images
When you refer to the "first image" in your prompt, that's the photo that has your guest(s). You can also upload additional images that you refer to in your prompt, in this section:
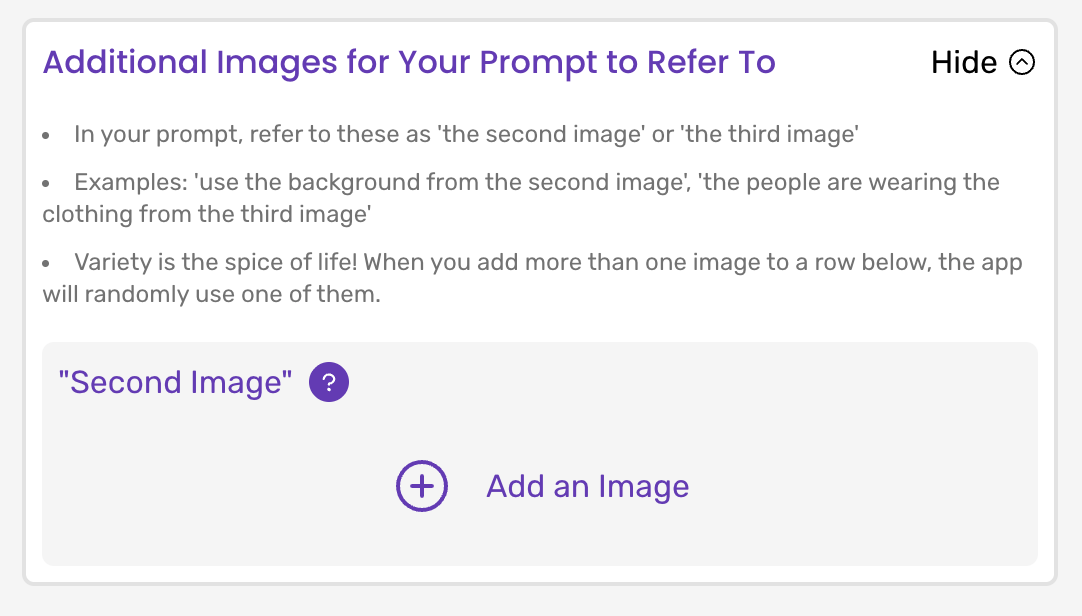
The Additional Images feature requires a Pro+ membership.
The number of additional images you can add depends upon the model you've chosen (see below).
You can add more than one image per "row". When you do this, the app will choose one of the images in the row at random. For example in the following screenshot, the prompt would refer to the "second image" and the app would either use the Crystal Palace primary kit (red/blue jersey) or away kit (white jersey); this would be chosen randomly each time an image is generated.

AI Model Selection
When AI Prompts first launched the only option was Nano Banana, so there was no selection for the AI model. There are now several options available:

It's important to understand that "Pro" does not simply mean "better". There are cases where using the original Nano Banana result is a better choice, and there are cases where Pro is a better choice. You need to experiment to find out which is best for your prompt.
The Pro model is better at preserving the likeness of your guests, and tends to make more realistic photos that follow your instructions better.
The regular model is much faster, and tends to produce photos that favor optimism over realism. That means it can end up making "happier" photos by default (you can prompt the Pro model to do this, but it's up to you to do so).
As you can see the cost in credits per image generation depends on what model you choose. The only difference between Nano Banana Pro 2K and Nano Banana Pro 4K is resolution: we recommend using the 2K version unless you have a specific use-case that needs the 4K version. The 2K version's resolution is more than sufficient for great digital & printed photos. For comparison, the original Nano Banana's resolution is 1K (1024x1024 pixels compared to Pro 2K's 2048x20248 pixels).
Gotcha: Aspect Ratios
The original Nano Banana model can produce photos in almost any aspect ratio. We don't give it any metadata about your images: it figures out by itself what aspect ratio to use based on the input image, which we crop to be the same aspect ratio as your template's photo area.
Most of the time this works really well, and occasionally the result ends up cropped weirdly because the resulting aspect ratio wasn't what your template expected.
The Nano Banana Pro model doesn't work like this: it takes an aspect ratio as input. We generate this input for you automatically, based on the photo area of your template. This aspect ratio must be chosen from this list:
- 1:1
- 2:3, 3:2
- 3:4, 4:3
- 4:5, 5:4
- 9:16, 16:9
- 21:9
That means that if your template's photo area really doesn't match any of those choices well, you'll get bad results. So make sure your template's photo area has the aspect ratio of one of these choices.
It's good practice to do the same for the original Nano Banana too!
Guest Experience in App
On the prompt page you have two settings that let you control how your guests create AI Prompt photos in the app.
Make sure you've updated to iOS app version 1.49.3 or newer to be able to use these settings.
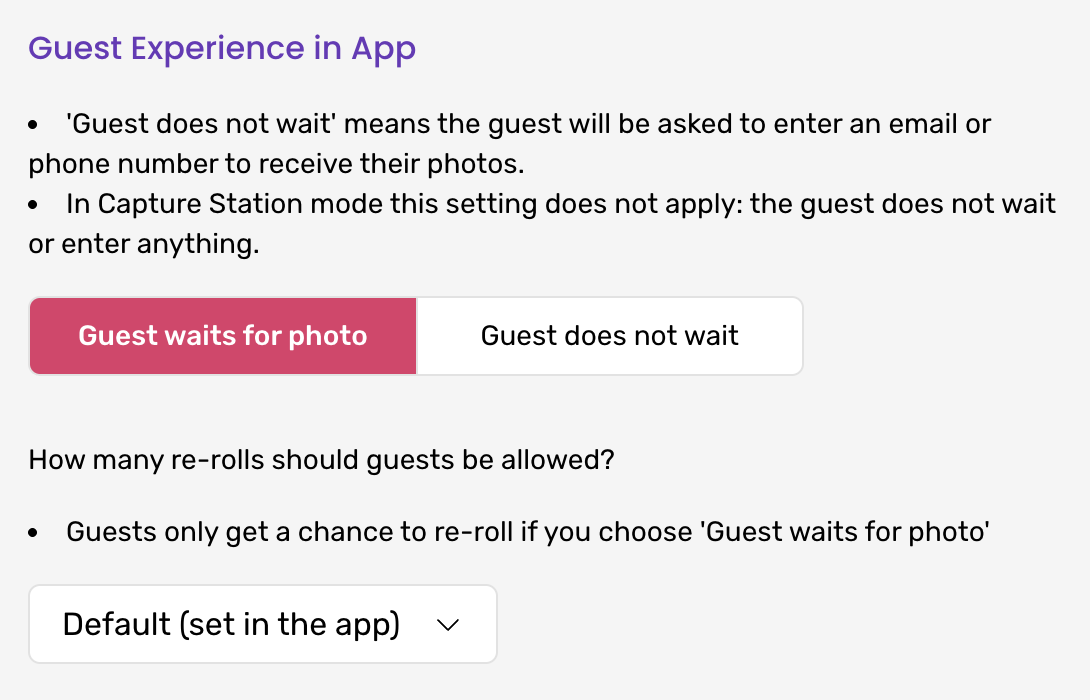
The first setting controls whether the guests wait for their photo at the iPad where the photo was taken, or, if they do not.
- If you choose "Guest waits for photo", they'll wait by the iPad. See the "AI Model" section above for the time this could be. For Nano Banana Pro it can take 30 seconds or longer which is a long time! you might want to change this.
- If you choose "Guest does not wait", the guest is forced to enter an email address or phone number to continue, and they don't wait for the photo to show up in the app - they'll get emailed/texted shortly after when the photo is ready.
- If you turn off both email + text sharing options, your guests will see a short message that their photo will be available in the gallery soon
The second setting controls how many times the guest can "re-roll" (regenerate) the image that gets created without having to take the photo again. Since this costs you credit(s) each time, you have the ability to control this. There's a setting for this in the iOS app, on the middle page of event settings — that is the default setting, meaning if you don't set anything on the prompt, that's what will be used. If you set this setting on the prompt page, it overrides the default setting. That's helpful for when you want all of your prompts on a template to allow overrides, but not this one prompt (which you set to 0 here).
Prompt Changes are Live!
Thanks to our Live Sync feature, any changes you make here - changing the model, the prompt text, the guest experience settings - they're immediately applied by any iPad that's online and using that template in its event. So use some caution when changing prompts if you have events running now.
Per-Prompt settings means Mix-N-Match ✅
Because these settings are changed at the prompt level and you can have multiple prompts for a single template or event, that means you can mix and match.
For example, let's say your client wanted 4 AI experiences. You spent time creating your prompts and you found that for 3 of them, Nano Banana did a great job - no need for Pro. That saves you credits, and makes the generations faster.
However let's say you found that for the 4th one, it really did not work well - then you tried Pro and it was much better! OK, but Pro is slower. So then you can choose to set just that one prompt to have the guest not wait. That means that the guest experience will change, depending on which prompt they choose in the app.